Opportunities
What is an Opportunity?
An opportunity represents a qualified business instance with the potential to become a sale.Unlike a Lead, which is in an early evaluation stage, an opportunity indicates that there is a concrete business possibility and that the sales process can continue through the different stages of the pipeline.
How are Opportunities obtained?
Opportunities can be generated in different ways:By converting a Lead that has previously been qualified as viable.
Through manual creation performed by a user within the CRM module.
Opportunity Management
Accessing the List
To access the opportunities list, go to CRM → Sales → Opportunities.From this section, it is possible to view and manage all opportunities registered in the system.
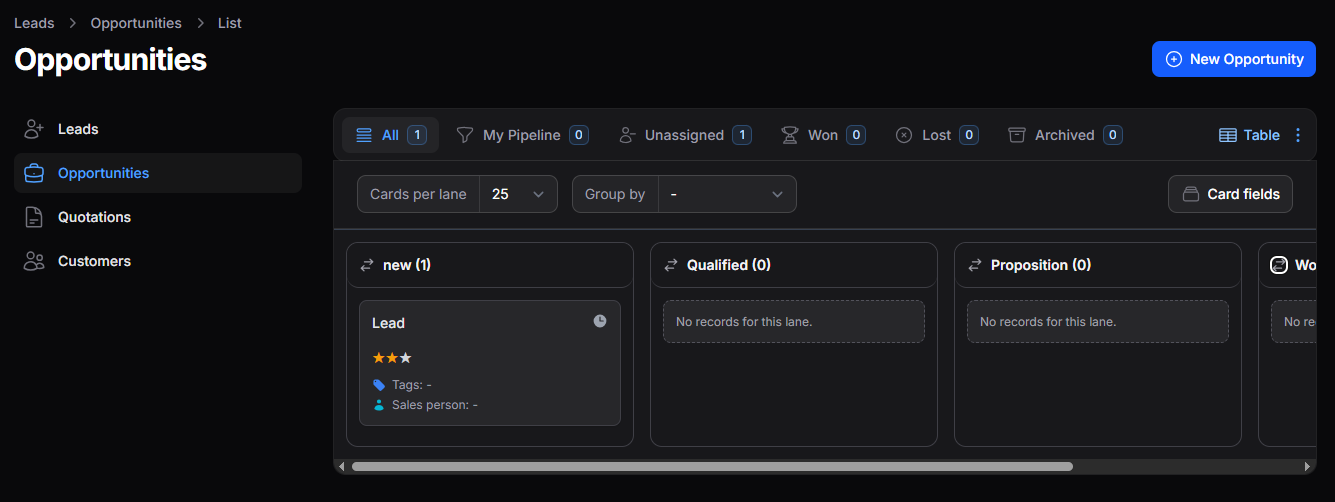
Figure 1. Opportunity list
Sales Pipeline
The sales pipeline allows organizing and tracking opportunities as they progress through the different stages of the sales process.
Figure 2. Sales pipeline stages
The sales pipeline stages are configured and managed from CRM → Configurations → Stages.
List Display
Opportunities can be displayed in Kanban or Table format depending on each user’s management needs.The view can be changed using the selector located in the upper-right corner of the list.
Kanban View
Allows viewing opportunities through cards organized by sales pipeline stages, making sales tracking easier.
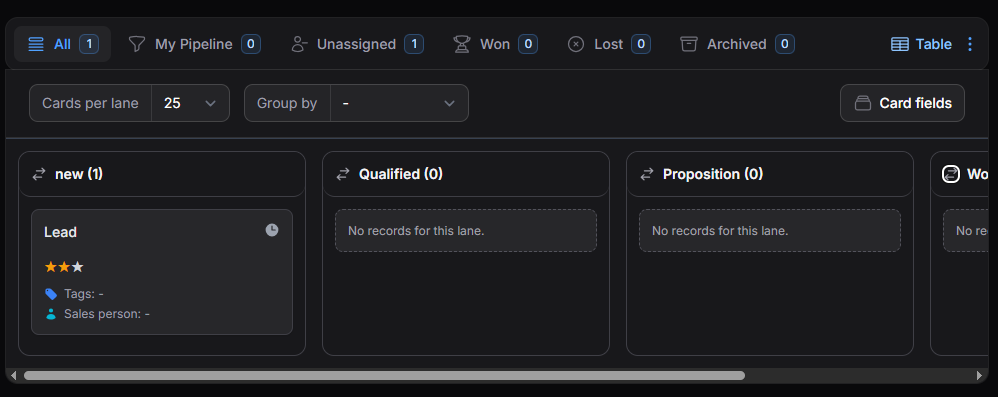
Figure 3. Kanban View
The columns in the Kanban view correspond to the sales pipeline stages.
Kanban View Tools
Allows defining the number of visible cards per pipeline stage.
Allows organizing opportunities according to different criteria.
Allows customizing the visible information on the cards. Selected fields will be displayed on all cards in Kanban view.
Table View
Allows viewing opportunities in list format, displaying detailed information for each record.
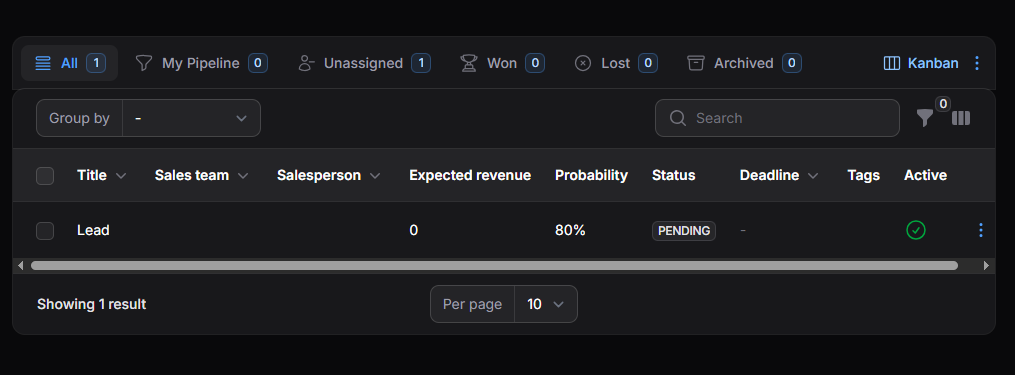
Figure 4. Table View
Table View Tools
Allows organizing opportunities according to different criteria.
Allows quickly locating an opportunity by name.
Allows applying criteria to display only specific records.
Allows selecting visible columns and reorganizing their order within the list.
List Views
The list views allow displaying opportunities according to different criteria, making record organization and follow-up easier.
Figure 5. Opportunity list views
Available Views
- All: displays all available opportunities.
- My Activities: displays opportunities with activities assigned to the user.
- My Pipeline: displays opportunities assigned to the user within their sales pipeline.
- Followed: displays opportunities followed by the user.
- Unassigned: displays opportunities without an assigned salesperson.
- Pending: displays active opportunities within the sales process.
- Won: displays opportunities marked as won.
- Lost: displays opportunities marked as lost.
- Archived: displays archived opportunities.
View Customization
Views can be customized from the Action Group (⋮) menu located in the upper-right corner of the list.
The Reset option restores the default view configuration.
Actions on Views
From this menu, additional actions are available to manage the behavior of each view.
- Apply View: applies the selected view to the list.
- Remove from Favorites: removes the view from favorites.
- Set as Default: sets the selected view as the default.
Create an Opportunity
Opportunities can be generated through the conversion of a previously qualified Lead or through manual creation by a user.
Conversion from a Lead
From the detailed view of a Lead, it is possible to convert the record into an opportunity once it has been qualified as viable to continue the sales process.To perform the conversion:
- Access the Lead view.
- Click on Convert to Opportunity.
- Confirm the operation.
Once the conversion is completed:
- The record will no longer be displayed in the Leads section.
- It will automatically move to Opportunities.
- The opportunity will be created with the initial stage configured for the pipeline.
The assigned initial stage will depend on the configuration defined for the sales pipeline.
Manual Creation
To manually create an opportunity:- Go to CRM → Sales → Opportunities.
- Click on New Opportunity.
- Complete the required information in the New Opportunity form.
- Click Create to save the record.
Opportunity Creation Form
When creating a new opportunity, a form will be displayed where the necessary information can be registered to manage and track a business opportunity.General
This section allows registering the main information of an opportunity.
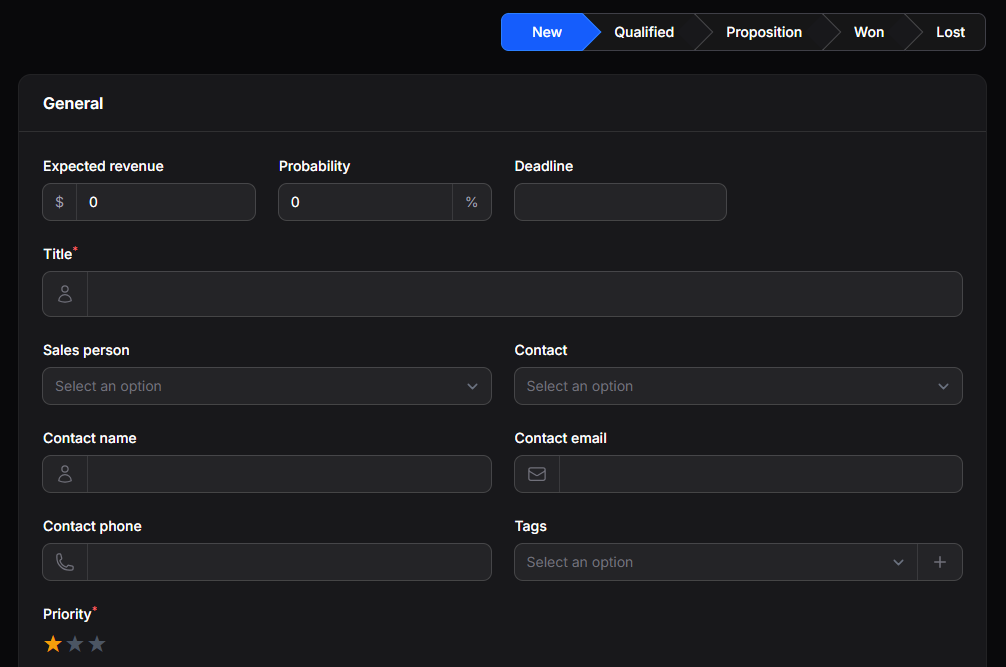
Figure 8. General section of the opportunity form
- Expected Revenue: allows registering the estimated revenue amount associated with the opportunity.
- Probability: indicates the estimated closing percentage of the opportunity.
- Due Date: estimated deadline for opportunity management.
- Title: identifying name of the opportunity.
- Assigned Salesperson: user responsible for commercial management.
- Contact: allows selecting an existing contact.
- Contact Name: name of the associated contact.
- Contact Email: email address of the contact.
- Contact Phone: contact phone number.
- Tags: allows assigning tags to facilitate classification and search.
- Priority: priority level assigned to the opportunity.
When selecting an existing contact, the system will automatically complete certain fields using previously registered information.
Additional Information
Allows registering complementary information associated with the opportunity. The information is organized into different sections to make management easier.
The Additional Information section allows expanding the opportunity details with extra data to improve tracking and classification.
Company Information
Allows registering location and company data associated with the opportunity.
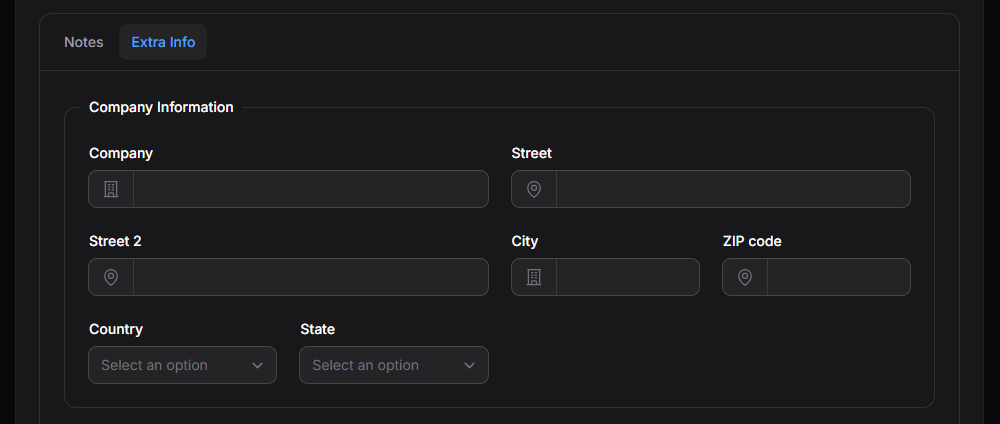
Figure 9. Company Information section
- Company: company associated with the opportunity.
- Street: main address.
- Street 2: secondary address.
- City: city.
- Postal Code: postal code.
- Country: country.
- Province / State: province or state.
Contact Information
Allows registering additional information about the contact associated with the opportunity.
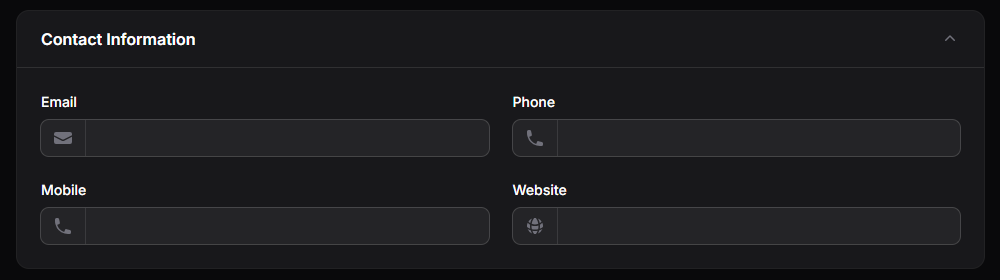
Figure 10. Contact Information section
- Job Position: position or role of the contact.
- Contact Website: website associated with the contact or company.
Ownership
Allows defining the internal assignment of the opportunity within the organization.
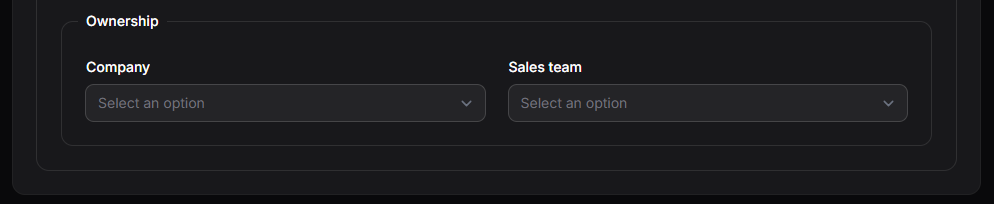
Figure 11. Internal Assignment section
- Company: internal company associated with the record.
- Sales Team: sales team responsible for the opportunity.
The information in this section is optional and can be completed according to the management and tracking needs of the opportunity.
Notes
Allows registering additional information, comments, or relevant details related to the opportunity.
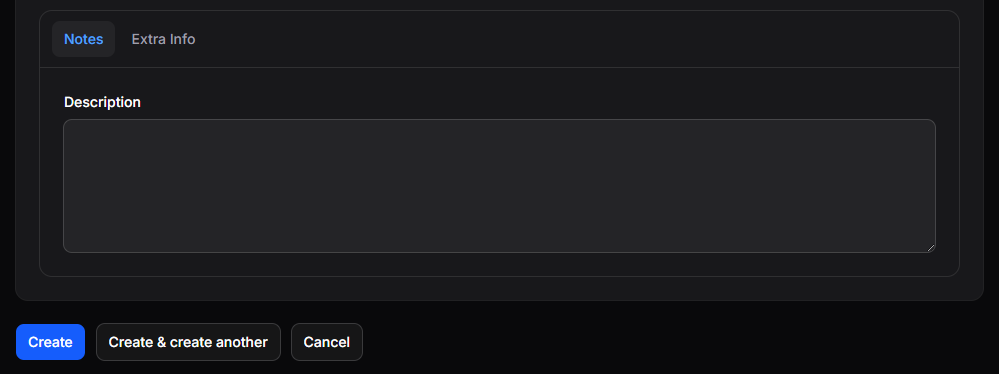
Figure 12. Notes section of the opportunity form
Final Actions
Once the opportunity information has been completed, the following actions will be available to finalize the record creation:
- Create: saves the opportunity and closes the form.
- Create and Create Another: saves the current opportunity and opens a new form to register another opportunity.
- Cancel: cancels the operation without saving the changes made.
Once created, the opportunity can be viewed in both Kanban and Table view, depending on the selected display format.
Actions on an Opportunity
Once an opportunity has been created, it is possible to access its information to review, modify, or manage its progress within the sales pipeline.
To access an opportunity and manage its actions, you can:
- Click on the corresponding opportunity.
- Use the Action Group (⋮) menu available at the end of each row in Table view.
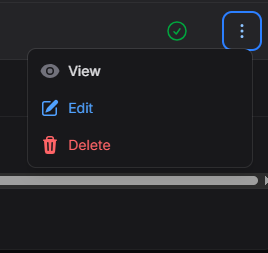
Figure 13. Action Group available for an opportunity
Opportunity View
The View option allows access to the complete details of an opportunity.When accessing it, all registered information will be displayed, including general data, notes, and additional information.
From this view, the following actions will be available:
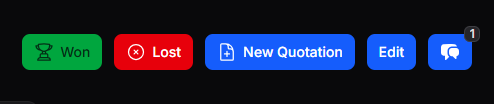
Figure 14. Available actions from an opportunity view
Mark as Won
The Mark as Won option allows indicating that the opportunity was successfully closed.
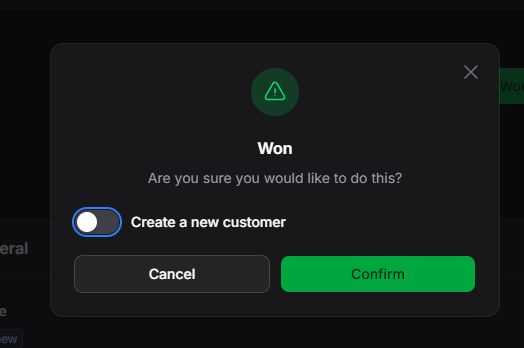
Figure 15. Won opportunity confirmation
Confirmation Options
- Confirm: saves the information and marks the opportunity as won without creating a new customer.
- Cancel: cancels the operation without making changes.
During confirmation, the Create a New Customer option can be enabled to register a new customer.
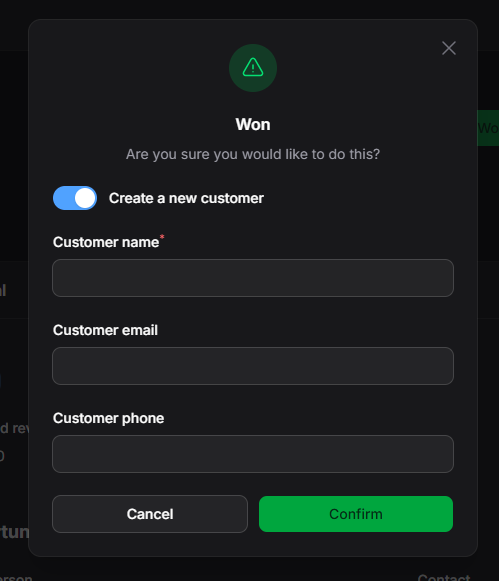
Figure 16. Won opportunity confirmation creating a new customer
If the opportunity already has registered contact information, the new customer fields will be automatically completed with the available data.
Customer Creation Options
- Confirm: saves the information, creates the customer, and marks the opportunity as won.
- Cancel: cancels the operation without making changes.
Opportunities marked as won can later be viewed from the Won view.
Mark as Lost
The Mark as Lost option allows indicating that it was not possible to continue the commercial management of the opportunity.
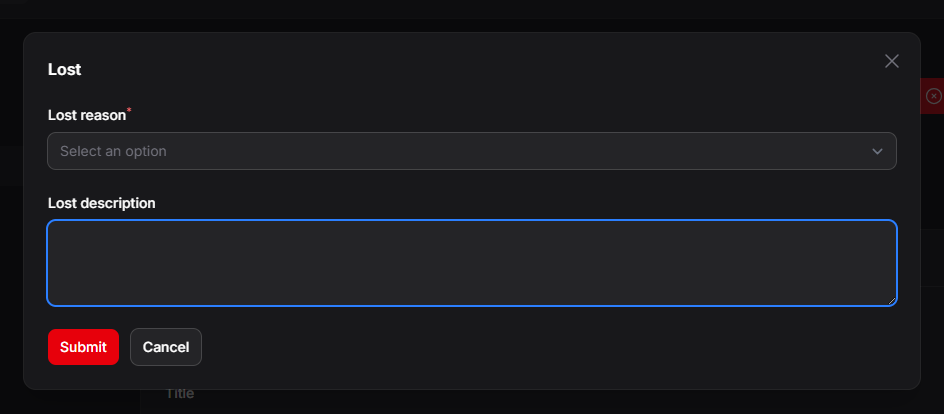
Figure 17. Lost opportunity confirmation
Available Fields
- Lost Reason: reason why the opportunity was marked as lost.
- Loss Description: observations or additional details related to the loss.
The Lost Reason options are configured from CRM → Configurations → Lost Reasons.
Management Options
- Submit: saves the information and marks the opportunity as lost.
- Cancel: cancels the operation without making changes.
Lost opportunities can later be viewed from the Lost view.
New Quotation
The New Quotation option allows generating a new quotation associated with the opportunity.
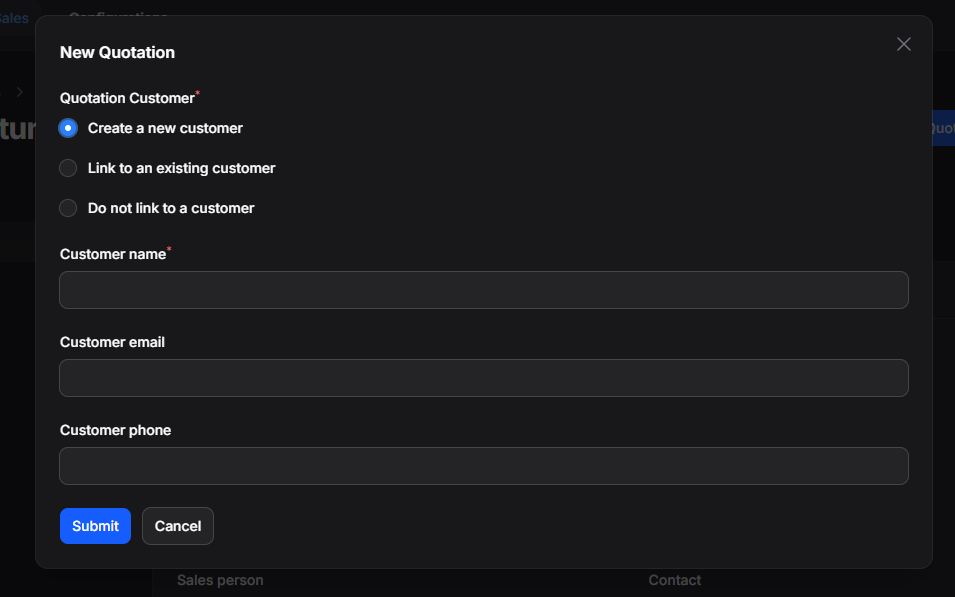
Figure 18. Quotation creation from an opportunity
From this window, it is possible to:
- Create a new customer.
- Link the quotation to an existing customer.
- Generate the quotation without associating it with a customer.
If the opportunity already has registered contact information, the customer fields will be completed automatically.
When confirming with Submit, the system will redirect to the quotation form.
Complete quotation management is documented in the Quotations section.
Chatter
The Chatter allows registering communications, notes, and activities related to an opportunity.
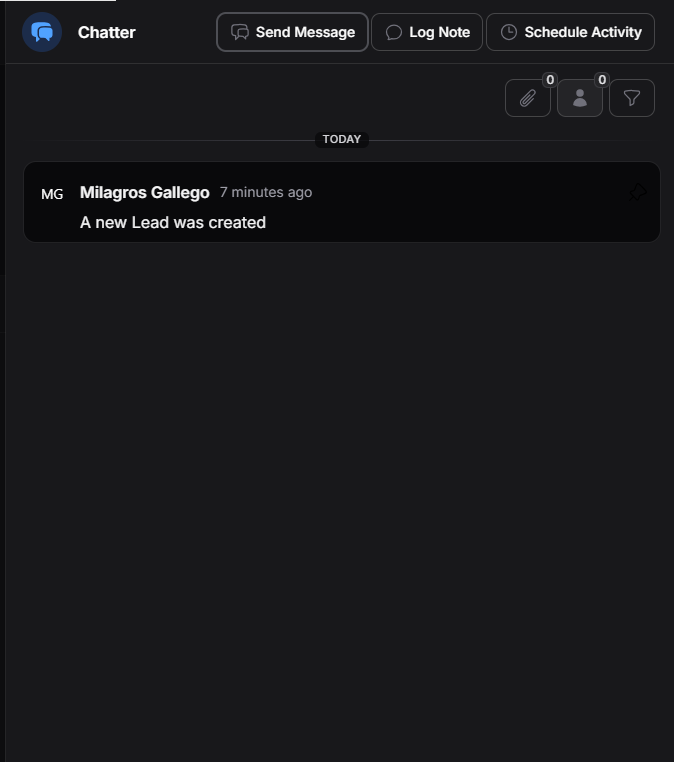
Figure 19. Chatter of an opportunity
Available Actions
- Send Message
- Log Note
- Schedule Activity
For more information about how Chatter and activities work, refer to the corresponding section.
Edit an Opportunity
The Edit option allows modifying the registered information.Once the changes are made, click Save Changes to save the information or Cancel.
Delete an Opportunity
The Delete option allows removing the opportunity from the main list.Once deleted, it will remain available in Archived, where the following actions can be performed:
- Restore: restores the opportunity.
- Delete Permanently: permanently deletes the opportunity.
Opportunities deleted permanently cannot be recovered later.