Projects
What is a Project?
A Project represents a workspace where tasks, assignees, and timeframes related to a specific objective are organized.This section allows planning and activity tracking to be centralized within the same project.
Project Management
Accessing the list
To access the Projects list, go to:Projects → Projects
Once inside, the main list of registered projects will be displayed.
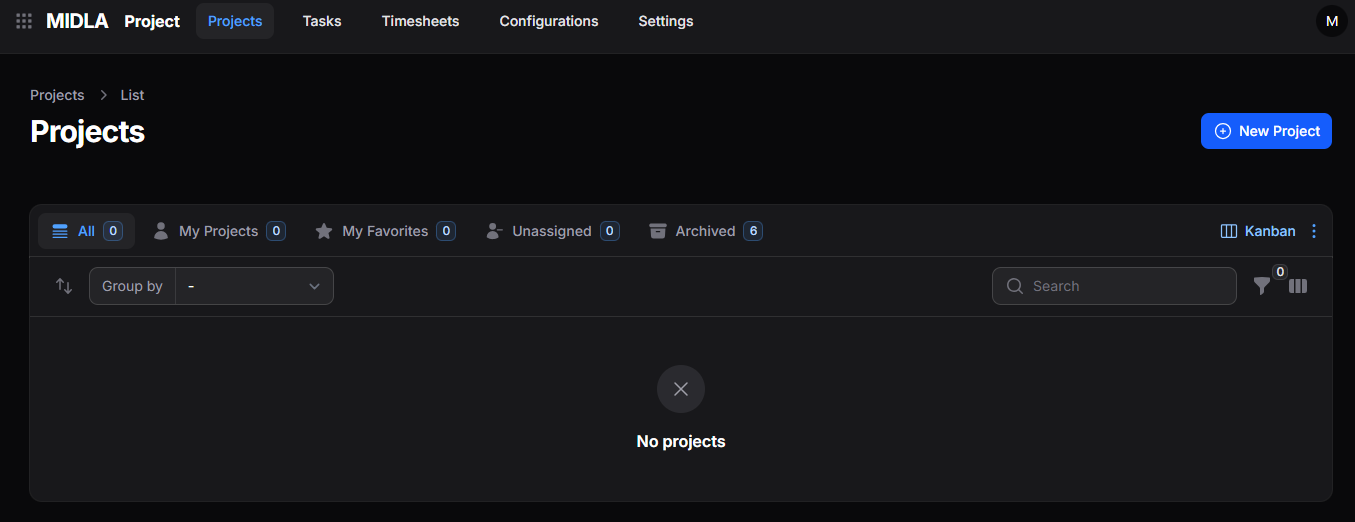
Figure 1. Projects list
List display
Projects can be displayed in different formats depending on each user's needs.Projects can be displayed in Kanban or Table format. The view can be changed using the selector located in the upper-right corner of the list.
Kanban View
Allows Projects to be displayed as cards organized according to the selected status or grouping.
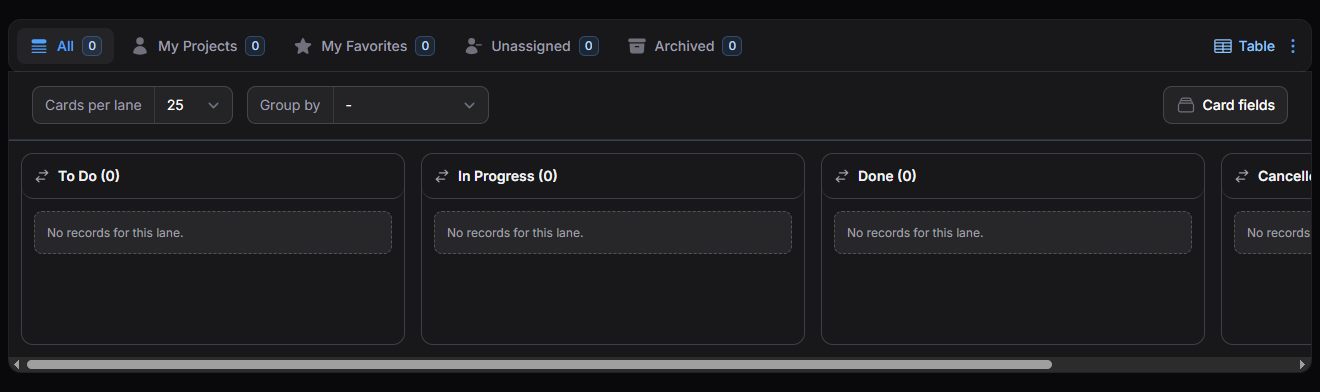
Figure 2. Kanban view
Available Tools
Group By
Allows grouping Projects according to different criteria.Card Fields
Allows configuring which information will be displayed inside each card.Cards per Column
Allows defining the number of visible cards per column.Table View
Allows Projects to be displayed in a tabular format, showing detailed information for each record.
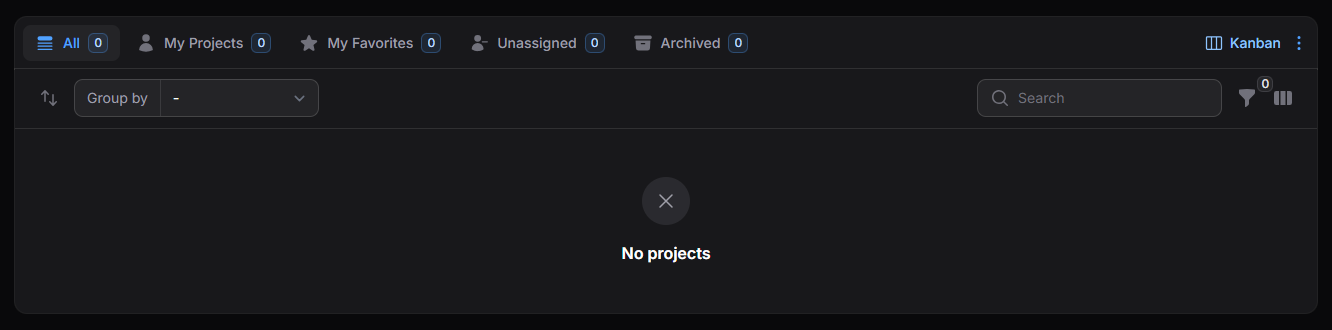
Figure 3. Table view
Available Tools
Group By
Allows grouping Projects according to different criteria.Search
Allows searching for registered Projects.Filters
Allows applying filters to the records.Column Manager
Allows configuring the visible columns within the list.Sort
Allows sorting records according to different fields.Available Views
The Projects list includes different quick views to organize and access records according to different needs.
Figure 4. List views
View Types
- All: Displays all active Projects.
- My Projects: Displays only the Projects assigned to the current user.
- My Favorites: Displays the Projects marked as favorites.
- Unassigned: Displays Projects without assigned assignees.
- Archived: Displays archived Projects.
The available views can be customized from the ActionGroup menu (⋮) located in the upper-right corner of the list.
From each view’s ActionGroup menu, it is possible to access additional actions to customize its behavior.
The Reset option allows restoring the default view configuration.
Create a Project
To create a new Project:
- Go to Projects → Projects.
- Click on New Project.
- Complete the required information in the creation form.
- Click Create to save the record.
Creation Form
When selecting New Project, the creation form will be displayed, where the necessary information must be completed to register a new Project.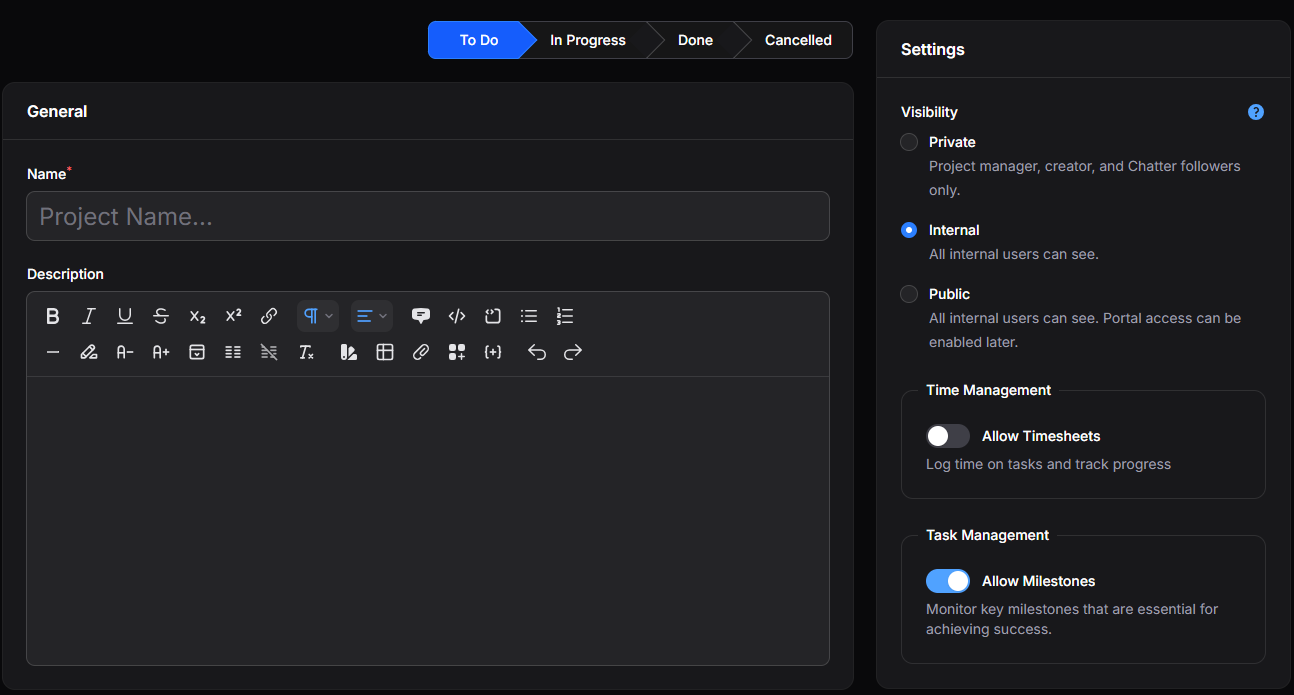
Figure 5. Project creation form
General
The General section contains the main Project information.
Available Fields
- Name: Allows defining the Project name.
- Description: Allows entering a general or detailed Project description.
Settings
The Settings section allows defining general Project configurations.
Available Fields
- Visibility: Allows defining the Project visibility.
- Private: Visible only to the assignee, creator, and followers.
- Internal: Visible to internal users.
- Public: Visible to internal users and portal users.
- Allow Timesheets: Enables tracking worked hours on Project tasks.
- Allow Milestones: Enables managing important milestones within the Project.
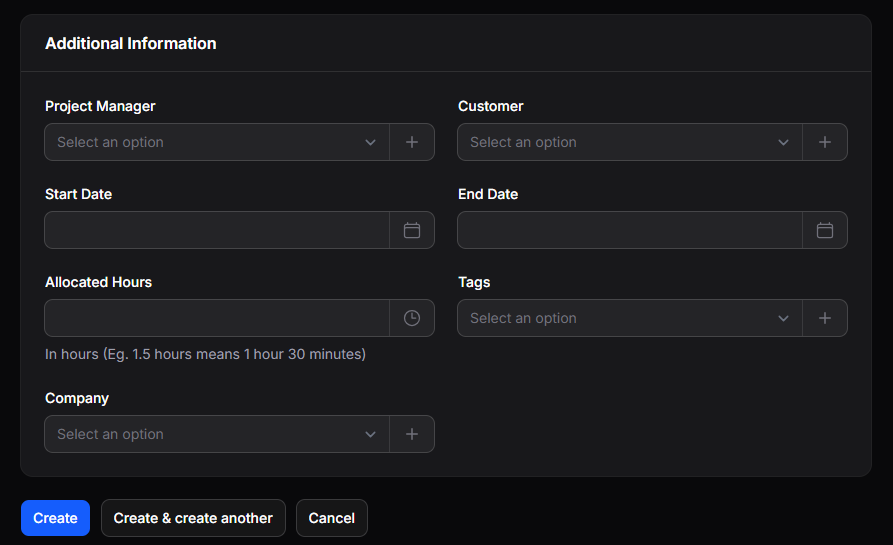
Figure 6. Additional Project settings
Additional Information
The Additional Information section allows registering complementary data related to Project planning and management.
Available Fields
- Project Manager: Allows assigning the main person responsible for the Project.
- Customer: Allows linking a customer to the Project.
- Start Date: Allows defining the start date.
- End Date: Allows defining the end date.
- Allocated Hours: Allows defining the estimated number of hours for Project development.
- Tags: Allows assigning tags to classify the Project.
- Company: Allows linking the Project to a specific company.
Available Actions
Once the information is completed, the following actions will be available:
- Create: Saves the Project and completes the creation process.
- Create and Create Another: Saves the current Project and allows creating a new one immediately.
- Cancel: Cancels the operation and returns to the Projects list.
Actions on a Project
The available actions can be performed in the following ways:
- By clicking directly on the corresponding Project card.
- By using the Action Group (⋮) menu available on the Project card.
View a Project
The View option allows accessing the complete details of a Project.When entering, all registered information for the Project will be displayed, including general information, settings, assigned users, associated tasks, and tracked times.

Figure 7. Available sections from the Project view
Available Sections
- Overview: Allows viewing the general Project information.
- Tasks: Allows accessing the management of tasks associated with the Project.
- Milestones: Allows accessing the management of milestones associated with the Project.
Task Stages
Inside the Project view, the Task Stages section is available, where the stages used by the Project tasks can be managed.
These stages define the workflow of the tasks within the Project and must be configured before starting to work with them.
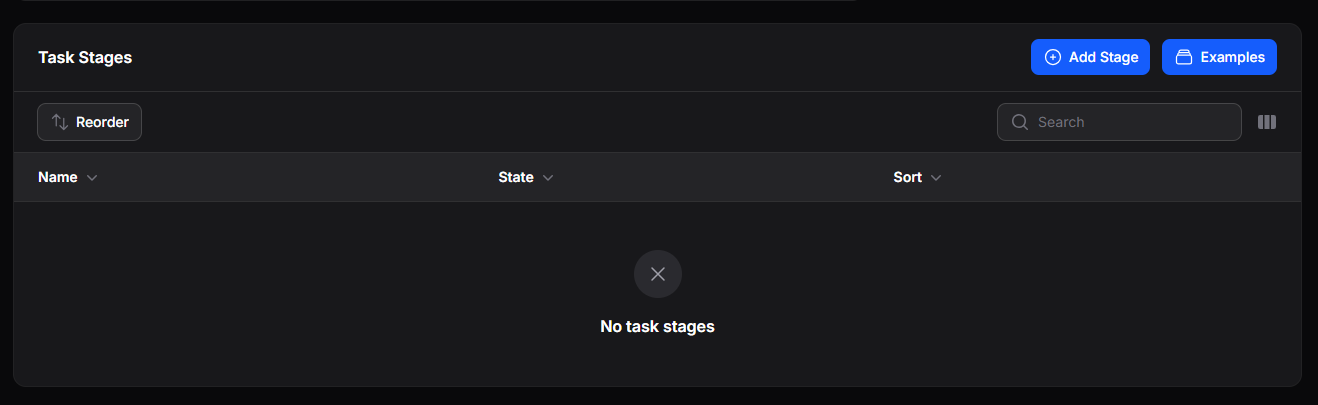
Figure 8. Task stages
Available Tools
Allows manually reorganizing the order of the stages.
Allows creating new stages for the Project tasks.
Allows loading predefined stage examples.
Allows searching for registered stages.
Allows configuring the visible columns in the list.
Task Management within a Project
Tasks within a Project
Once the stages have been configured in Task Stages, the Tasks section will allow creating, viewing, and managing all tasks associated with the Project.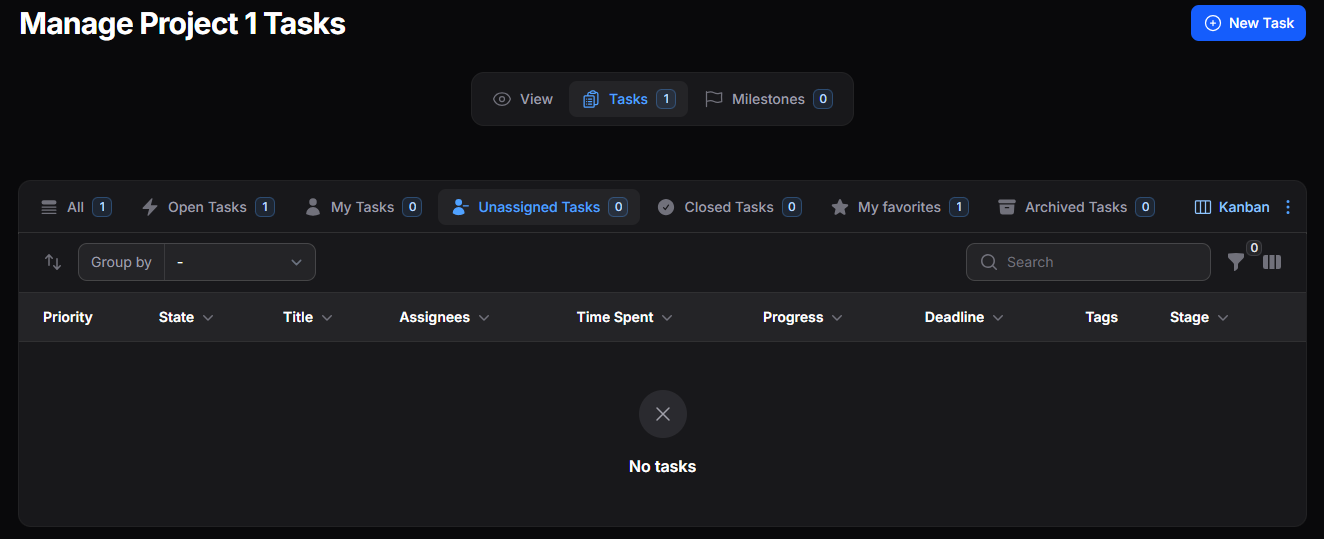
Figure 9. Task management
Tasks can only be created from this section within the Project view.
List Display
Tasks can be displayed in Kanban or Table format.
The view can be changed using the selector located in the upper-right corner of the list.
Available Views
- All: Displays all tasks registered within the Project.
- Open Tasks: Displays only tasks that are currently open.
- My Tasks: Displays only tasks assigned to the current user.
- Unassigned Tasks: Displays tasks without assigned users.
- Closed Tasks: Displays completed tasks.
- My Favorites: Displays tasks marked as favorites.
- Archived Tasks: Displays archived or deleted tasks from the main list.
The available views can be customized from the Action Group (⋮) menu.
Create a Task
Tasks allow registering specific activities within a Project to organize work and track its progress.To create a task:
- Go to Projects → Projects.
- Select the corresponding Project.
- Access the Tasks section.
- Click on New Task.
- Complete the required information.
- Click Create to save the task.
Creation Form
When creating a task, a form divided into different sections will be displayed to register the corresponding information.
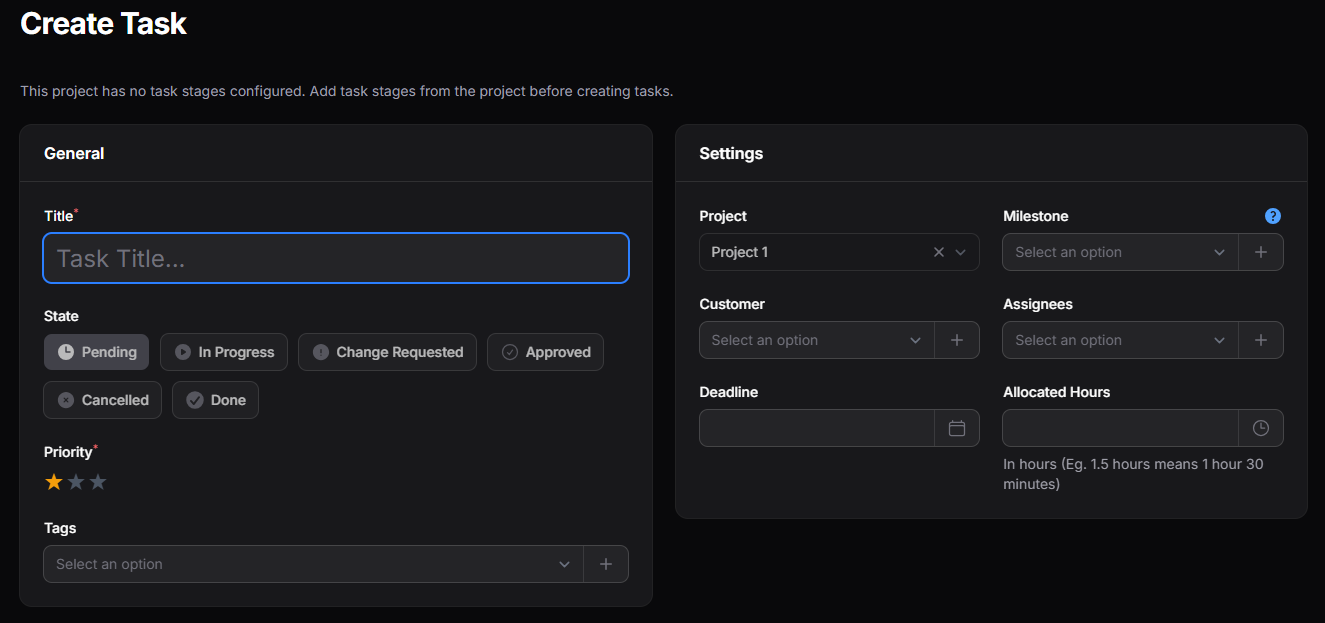
Figure 10. Task creation form
General
The General section contains the main task information.
Available Fields
- Title: Allows defining the task name.
- Status: Allows setting the current task status within the workflow.
- Priority: Allows assigning a priority level.
- Tags: Allows assigning tags for better organization.
Settings
The Settings section allows defining the relationship between the task and other Project elements.
Available Fields
- Project: Displays the Project to which the task belongs.
- Milestone: Allows linking the task to a Project milestone.
- Customer: Allows associating a customer.
- Assignees: Allows assigning responsible users.
- Deadline: Allows defining an execution deadline.
- Allocated Hours: Allows setting the estimated working time for the task.
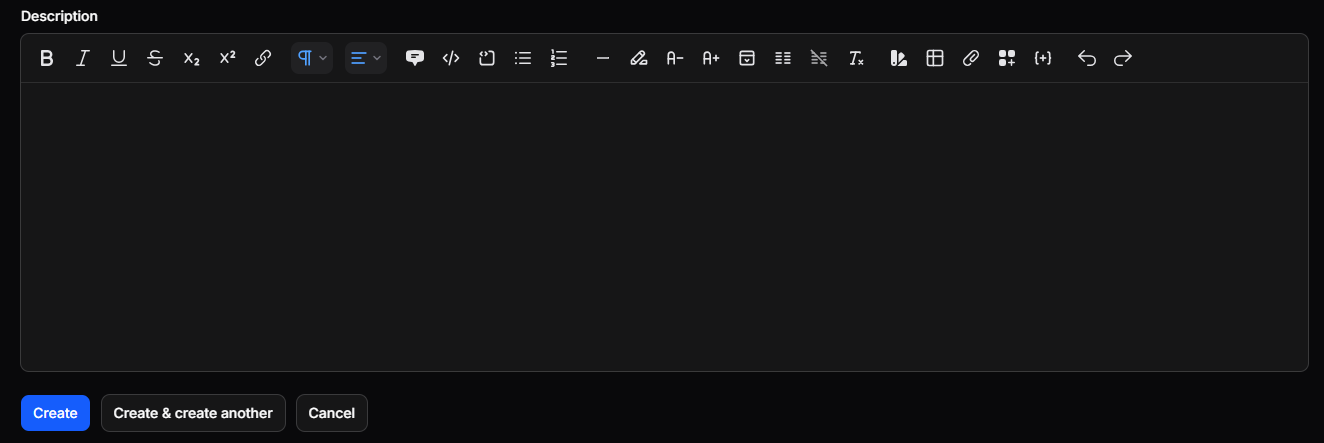
Figure 11. Task creation form
Description
The Description section allows registering additional information, notes, or relevant details about the task.
Available Actions
- Create: Saves the task and completes the creation process.
- Create and Create Another: Saves the current task and allows creating a new one immediately.
- Cancel: Cancels the operation and returns to the main list.
Actions on a Task
Once a task has been created within the Project, it will be possible to access its information to view, edit, or delete the record.The available actions can be performed in the following ways:
- By clicking directly on the corresponding task.
- By using the Action Group (⋮) menu available at the end of each record.
View a Task
The View option allows accessing the complete details of a task.
When entering the task view, all registered information will be displayed.
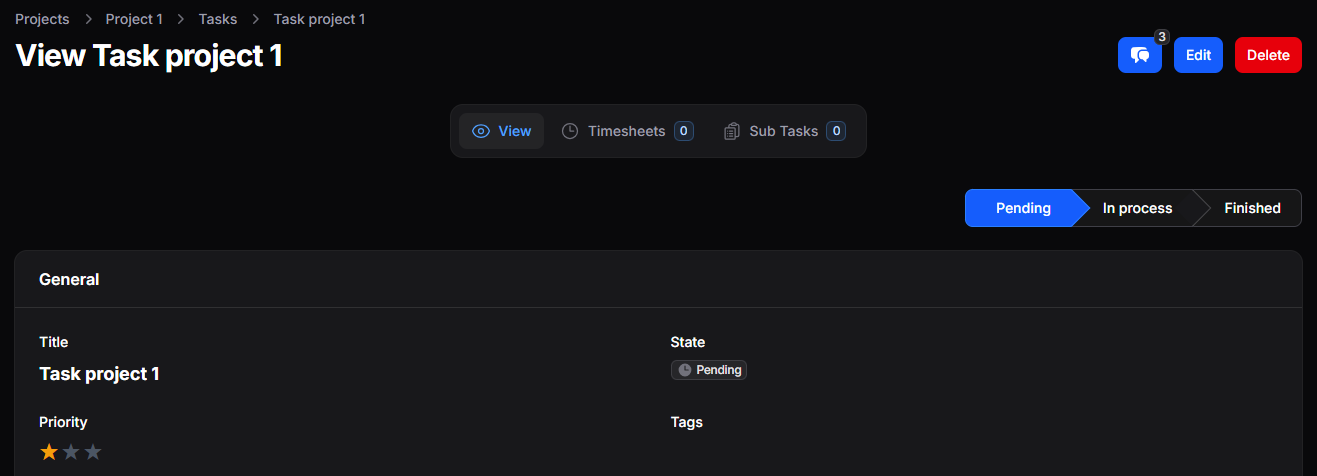
Figure 12. Task view
Task Stages
Allows viewing and updating the task status flow.

Figure 13. Task stages
When the status is updated, the task will automatically be updated in the Kanban view, moving to the corresponding column.
Available Sections
- view: Allows viewing the general task information.
- Timesheets: Allows registering and reviewing worked time on the task.
- Subtasks: Allows creating and managing subtasks associated with the task.
Figure 14. Available sections
Timesheets
The Timesheets section allows registering worked time on the task to maintain detailed control of the time invested.
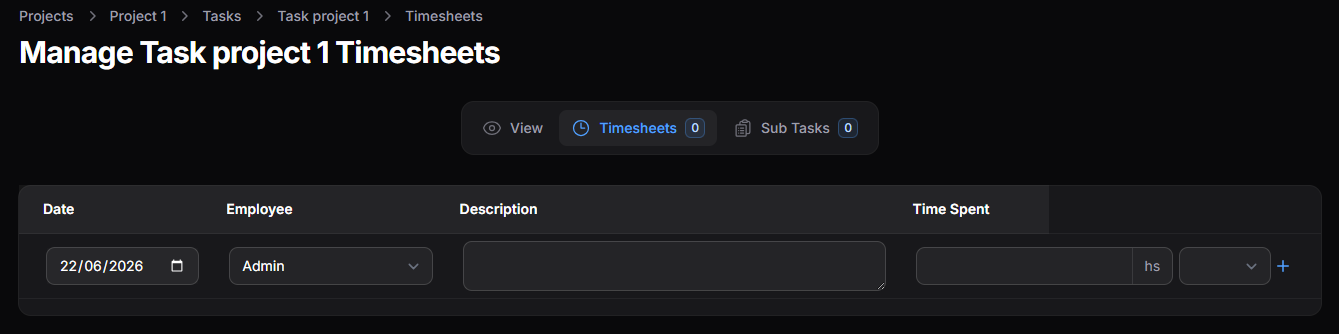
Figure 15. Task timesheets
Available Fields
- Date: Allows registering the date of the worked time.
- Employee: Allows selecting the user responsible for the record.
- Description: Allows adding a description of the performed activity.
- Time Spent: Allows indicating the amount of time used.
Subtasks
The Subtasks section allows creating and managing subtasks related to the main task, making it easier to divide work into more specific activities.
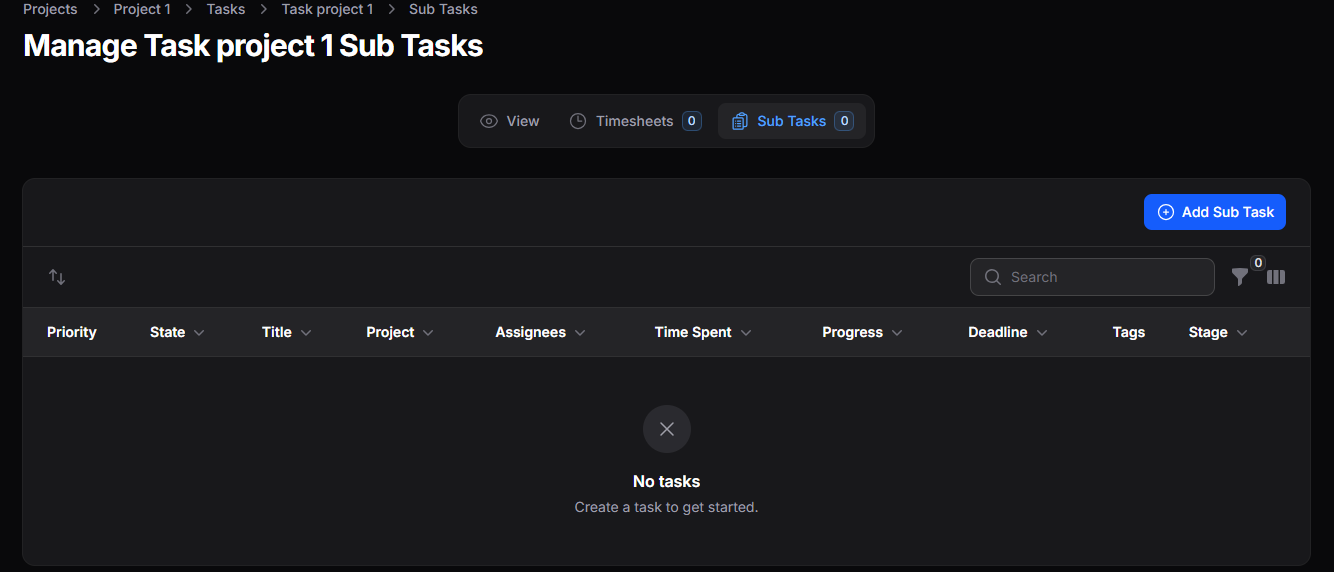
Figure 16. Subtasks
The Subtask creation form keeps the same structure, sections, and fields as the main Task creation form.
Edit a Task
The Edit option allows modifying the information of an existing task.
When accessed, the form will display the previously registered information to make the necessary changes.
Delete a Task
The Delete option allows removing a task so it no longer appears in the main list.
Once deleted, the task will remain available in the Archived Tasks view, where additional actions can be performed.
Available Actions in Archived Tasks
- Restore: Allows restoring the task and returning it to the main list.
- Delete Permanently: Permanently removes the task from the system.
Tasks deleted using Delete Permanently cannot be restored later.
Milestone Management within a Project
Milestones
Milestones allow registering important events within a Project to track objectives, deliveries, or key dates.The Milestones section will only be available within the Project view when the Allow Milestones option has been enabled during Project creation or editing.
Within this section, it is possible to view, create, edit, and delete milestones associated with the Project.
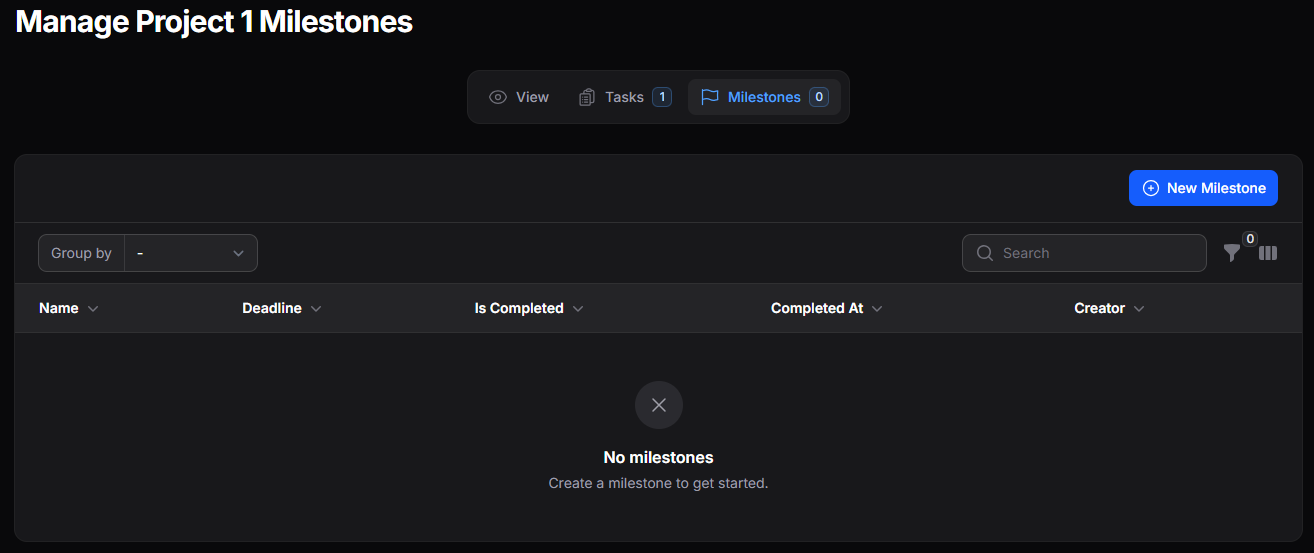
Figure 17. Milestones
Create a Milestone
To create a milestone:- Go to the Milestones section within the Project.
- Click on New Milestone.
- Complete the required information.
- Click Create.
Creation Form
When creating a milestone, a form will be displayed to register the corresponding information.
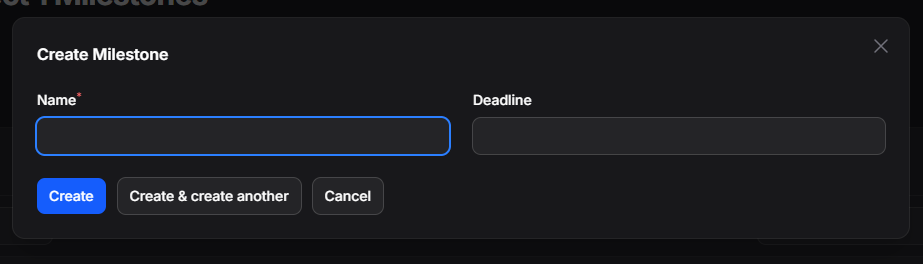
Figure 18. Milestone creation form
Available Fields
- Name: Allows defining the milestone name.
- Deadline: Allows setting a deadline for the milestone.
Available Actions
- Create: Saves the milestone and completes the creation process.
- Create and Create Another: Saves the current milestone and allows creating a new one immediately.
- Cancel: Cancels the operation and returns to the list.
Actions on a Milestone
Actions on a Milestone
Once a milestone has been created within the Project, it will be possible to access its information to view, edit, or delete the record.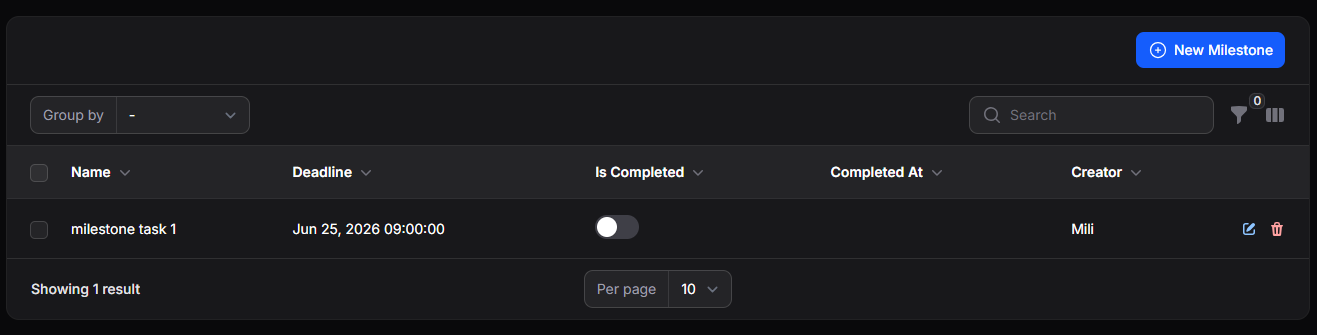
Figure 19. Milestone record
Mark a Milestone as Completed
The Completed option allows indicating that the milestone has been finished.
When activated:
- The Completed On field will automatically register the completion date and time.
- The milestone will be identified as completed within the list.
Edit a Milestone
The Edit option allows modifying the information of an existing milestone.
When accessed, the form will display the previously registered information to make the necessary changes.
Delete a Milestone
The Delete option allows removing a milestone from the Project.
Once deleted, the milestone will no longer be available within the Project.
Edit a Project
The Edit option allows modifying the information of an existing Project.When accessed, the form will display the previously registered information to make the necessary changes.
Delete a Project
The Delete option allows moving a Project to the Archived view to remove it from the main list.Once deleted, the Project will remain available in the Archived view, where additional actions can be performed.
Available Actions in Archived
- Restore: Allows restoring the Project and returning it to the main list.
- Delete Permanently: Permanently removes the Project from the system.
When the Delete Permanently option is executed, the Project and all associated information, including Tasks, Subtasks, Timesheets, and Milestones, cannot be recovered later.